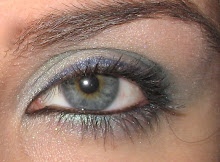
So we just got back from a fab beach weekend and I felt it was very important to blog about my mascara routine. As we all know mascara can basically change your entire look (for the better) and many times it's all you need as you run out the door. My routine, which I think works great for me (and could for you too!), is as follows in order:
Shu Uemura Eye Lash Curler
Mac Prep and Prime
Mac Zoom in black
LashBlast by Cover Girl in very black
Tarte Lights Camera Action in black
Maybelline Lash Discovery in black
Now I know what you all must be thinking - OMG!! So many mascaras to use at one time! But I am telling you, you will be amazed at the results when you use more that product as well as the eye lash curler. No more fake eyelashes for this make up lover. Oh and by the way I promise it will only tack on about two extra minutes to your normal make up routine. Give it a try! Tell me what you think about it…
-S
Photo: CoverGirl.com
Tuesday, July 29, 2008
Wednesday, July 23, 2008
Please Excuse Me While I Powder My Nose
I go back and forth on the usage of powder. I used to use it a long time ago and then I stopped. I often go through periods where I do this with products. I recently got back to using powder when KA was telling me about hers. I felt like powder would be a good fit for me since my face is very oily and could use a touch up every now and then.
My choice: Stila's Sheer Pressed Powder. Made specifically for oily types, this powder does do its job well. Anytime I've been out for a long time, whether it be a weekend project or just a day at the office, I can rely on my Stila powder to take away my shine instantly. I wouldn't say I'm completely blown away, however. If I found another powder that did the same or a better job I may be easily swayed. I've heard good things about Clinique, but we'll see if I can score a sample of some other powder. But I do like the Stila powder for now and will continue using this product to powder my nose.
-A
Photo: Sephora.com
Tuesday, July 22, 2008
A Steal of a Deal
Brushes are a must, but sometimes it's very pricey to buy all the necessities. Lucky for us, Nordstrom is having their fabulously delicious anniversary sale right now and they always have a ton of wonderful deals. One in particular that I took advantage of was a MAC brush set, exclusively sold at Nordstrom. For only $49.50, I got some of the most important brushes you'll need to add to your makeup repertoire.
Five brushes come in this collection, as well as a makeup bag and a wallet-style brush holder. I bought the purple one, pictured here, but the same set also comes in green. The red set is a set of five different brushes, but the one I purchased seemed the most appropriate for my makeup routine.
Brush 1: 187 SE - This brush I'll use with my bronzer. It's for lightweight application and it really smoothes your face out to evenly apply makeup. Purchased separately, it'll cost you $42.
Brush 2: 168 SE - This white brush (don't get scared, because you'll be washing your brushes frequently, right?) is perfect for your cheeks. I use it with my blush and get the perfect amount of color to exaggerate my cheekbones. Alone, it runs for $32.
Brush 3: 275 SE - Perfect for blending your shadow, this small angled brush works well after you've applied your colors. Smokey eyes will be a piece of cake with this brush. You can even apply your shadow with this brush, making it multi-functional. Retail price is $24.50.
Brush 4: 219 SE - For some added exaggeration in your crease or on your lash line, use this pencil brush for precision. Since it's still flexible and completely stiff, you'll be able to get some nice blending with the rest of your lid. It's normally $23.
Brush 5: 212 SE - This flat brush is great for lining the eye. I like to use it under my bottom lashes with a shadow that I may not have a liner for. It makes not having to buy more pencils a nice money-saving plus. Buy it out of the set and it's $21.
Now, if you add up all those brushes, you'll be brought to the grand total of $142.50 and you won't get the nice purple cases! But hurry because they're only there as long as supplies last at Nordstrom - it's the one limited edition I really couldn't live without!
-A
Friday, July 18, 2008
False Lash Impressions
JW complemented me on my eyes the other night. I hadn't seen her since my birthday weekend when I first tried out my fake eyelashes. I was completely sold on Sephora's brand of fakeys, especially since I kept getting so many complements. JW loved them and she gave me some of her recommendations on the lashes.
The other night she asked S if I was wearing the fake lashes and S told her that I was not. JW later told me that she had been fooled by my eyes that looked so full and lengthy. My secret? Primer, three good mascaras, and shu uemura.
Now, three mascaras seems completely ludicrous. Who has that kind of time? But after a while you just kind of become used to using them and it seriously lasts all day long. Here's my process (and don't be discouraged by the length because it really doesn't take that long!!):
1. Use your eyelash curler (shu uemura = love) to prep your lashes.
2. Prime your lashes with a white base, like Prescriptives Lash Builder.
3. I like to start my mascaras with a thinner, professional type brush, like Clinique's High Definition lashes.
4. A thicker brush is next. I use Sephora's Lash Plumper.
5. Use the shu uemura again.
6. Finish it off with a thin brush, like Cover Girl Lash Exact or Maybelline Define-A-Lash.
Yes, I have had many trials and tribulations with mascara, but through trial and error I have found the best options that work for me. And with my very own lashes I can give off the false impression that they are too good to be true. But they're all mine!
-A
Photo: shuuemura-usa.com
Labels:
eyelash curler,
eyelashes,
mascara
Wednesday, July 16, 2008
Making Up an Appointment
A makeup appointment is something that can really help you understand what you should be using daily. For my cousin's engagement party last year, we went to Smashbox to get our makeup done and that was my chance to really talk to the makeup artist about what I needed for my face or her suggestions on what to use if I was unsure. In fact it was there that she told me I should be using a moisturizer daily despite the fact that I had such oily skin!
Of course I walked out of the makeup appointment with a lip gloss (which I liked at the time) and the Photo Finish Color Correcting Foundation Primer (which I actually don't use anymore because after a while I didn't think it did much). But it's really good to get a sense of what a professional thinks of your face and the products you use.
It's a great opportunity because although they tend to coax you into buying products, you'll learn more about yourself and you'll get a nice makeup face out of it - so make sure you've got somewhere to go afterwards!
Some common places* to get your makeup done:
- Sephora only does half your face, as a consultation, but you'll still get some expert tips and tricks
- MAC in Macy's does your whole face, as long as you buy $50 worth of products (but that's also totally worth it)
- Smashbox in Nordstrom did my face for free and I bought a few products
*You usually do need to buy a product or two to get your makeup done. Also, check with your local store to see what they do because they may or may not have the same stipulations. These were just a few examples.
-A
Photo: TooFaced.com
Labels:
appointment,
makeup
Tuesday, July 15, 2008
LOOK: My friend SEV
Angelina Jolie just had her twins, a boy and a girl, but that doesn't mean that she should let her beauty fall by the wayside. A little tinted moisturizer, colored eyeliner, eyelash primer, mascara, and some blush or bronzer and BAM she's ready to feed the twins! OK, let's be honest, Angelina probably won't be having to feed the twins on her own or worrying about running out of her fave beauty products. But there are lots of us that can use a quick refresher course on how to look natural and get out the door in the morning.
SEV tells us that it only takes her 10 minutes to completely prepare her face in the morning and that includes face washing and moisturizing. Take that out of the equation and you can practically prep your face in the car in about only five minutes (after you've already washed and moisturized of course). And the combo of products she uses are pretty simple:
Neutrogena Summer Glow Moisturizer
Clean and Clear Salicylic Acid Gel
Neutrogena Eye Brightening Cream
Prescriptives Camoflauge Cream
Bobbi Brown's Cream Pot Rouge Blush
Nars Bronzer
shu uemura Eyelash Curler
Sometimes, SEV uses a little eyeshadow, but she says she does this very rarely. In addition she makes it known that it's very important to brush your teeth. We agree.
In addition, SEV uses Blistex LipBalm, mainly because she hates chapped lips. In fact, they actually freak her out a little bit. To counter this problem, she'll use the Blistex or for a little extra the Clinique Lip Balm, which has a sheer color to it. Lips are always good to condition (I'm sure Angelina treats hers well!).
So whether you have a little time, a lot of time, newborn twins, or just don't like to spend a lot of time on your makeup, then find the right routine for you to create your natural face. It may take some time but be sure to try out different products and samples. Remember, products work differently from person to person.
Makeup doesn't have to be time consuming - you can look natural and have fun with your friends and family, while looking great!
-A
Labels:
achieve this look
Store Brand
I want to tell you about one of my favorite lines of makeup: Sephora brand! Now I know you have seen previous posts where we have reviewed some Sephora brand products. I am here to say that we have only positive things to say about the entire line - once again proving you do not have to break the bank to look beautiful! Sephora even makes a great replica of one of my favorite products (Benefit's Eye Bright). In the Sephora line it's only $5, which is absolutely amazing! They also have tons of colored mascaras and colored eyeliners, which, like A, is my current obsession. Basically whatever it is that you are looking for you can find in this line. Some of your favorite products from other lines may already be available in Sephora's line - all you have to do is look!
-S
-S
Labels:
sephora
Monday, July 14, 2008
Lusting for Eyeliners
You'll find my summer obsession within my eyes. To bring out my baby blues I've resorted to using some funky colored eyeliners. Just like S, I like to use these colors when I'm running out and don't have much else on. However, they are also great to funk up a dramatic night look. A bright liner is great for the smoky eye to take away from the completely dark and dreary. Among my faves are Lust by Urban Decay and Hyacinth by MAC.
Lust (pictured, left) is a bright purple (a shade that tends to deepen the blue), while Hyacinth is a bright shade of blue. The thinner you make the line, the more subtle the look of course. I tend to only put these liners on the top lid just because I really like to use a thin brush with a shadow as a bottom liner. And, depending on the day, you may not want to use these bright liners on the top and the bottom because we don't want overkill either.
Try thinking out of the box and don't be afraid to use color. Black and brown are great but a bright color can brighten up your face, especially for the summer. There's always a shade that suits each person just right so take your fave color and take a look at the liners by both Urban Decay and MAC.
-A
Photo: Sephora.com
Thursday, July 10, 2008
Bye Bye Raccoon Eyes
I may put on three different mascaras plus a primer every day, but how do I get that stuff off my eyes at night without scrubbing my lashes off? The answer is simple and not very pricey at all. Sephora's FACE Waterproof Eye Makeup Remover.
This product (priced from $6-10, depending on the size you buy) will certainly remove anything. You just put maybe a penny-sized amount on a cotton ball and wipe off each lid. Then wash your face. I should also note that you need to shake the liquid up well first before using it.
Who knew it was as simple as finding a Sephora brand product?! Never underestimate these kinds of products, as they tend to be some that will fly under the radar from time to time. But we've already told you about so many of Sephora's products that we use (Daily Brush Cleanser, Mascara, and Eye Liner to name a few).
My mom likes waterproof mascara and I've had her use this eye makeup remover before so I know that it works on this, as well as longwearing mascara. In addition, this product is solely an eye makeup remover, instead of just a regular makeup remover you'd use for all of your face. So this is specifically made to take hard to remove eye makeup off your eyes.
Sephora's FACE Waterproof Eye Makeup Remover is so easy to use, safe, and the best way to not have those raccoon eyes or white towels that end up looking like Dalmatians!
-A
Photo: Sephora.com
Labels:
eye makeup,
eyes
Tuesday, July 8, 2008
Escentual Bases That Bare All
Foundation is defined as the basis or groundwork of anything, according to Dictionary.com. So it's slightly comical to me that my foundation is the third product I put on my face (it follows my moisturizer and spackle primer). I've tried both liquid and mineral and I'm here to tell you about my experiences.
For years I used Prescriptives' Virtual Matte Oil Control Makeup. This was a liquid foundation that I got by walking up to the counter in Macy's and asking the cosmetologist for some help. And from then I was hooked. I used my liquid foundation with SPF 15 every day for probably two years. There was only one problem. It always left makeup everywhere. I didn’t know any better. My face was oily and it didn't really do much to control oil (even though it's in the name of the product!). So I stopped using foundation for a while but every so often I'd use just a little to cover up main problem areas.
Then I heard about mineral makeup. I only discovered it really because I was curious as to what the buki brush's function was. I picked out the bareMinerals SPF 15 Foundation by Bare Escentuals because I had seen it won awards and was recommended by Glamour and Sephora. At first I was not impressed because I felt like the powder went absolutely everywhere except for my face. But after reading and hearing stories, I realized that you need to take some on the brush, shake off the excess, and apply in a circular motion.
I didn't really use it all that much, until yesterday. I thought I'd give it another try and I must say that I really have noticed a difference. My face has looked brighter and the imperfections on my skin, including redness and some scarring from acne, is much less visible. I’m going to continue using my mineral makeup foundation all week and hopefully it becomes something that I can stick with, especially throughout the summer, as it seems light and airy.
I know foundation, no matter what form it's in, is certainly a base. And although it's not the first thing I put on every day, it's certainly an essential.
-A
Photos: Prescriptives.com and bareescentuals.com
Labels:
foundation
Clean Up!
Ok so now we know any makeup lover has to have the essentials, one of them being brushes right? Well do we all know how much bacteria can build up on those brushes? EWWWWW!!
With that being said I would like to recommend the MAC brush cleaner, and I know what you're all thinking, why always MAC? Well the brush cleaner happens to be super affordable and preserves the life of the brush. I usually clean my brushes once a week. On the in between days I like to spray Sephora professional daily brush cleaner anti-bacterial formula. This is just to be sure that all that bacteria is killed on a daily basis. If any of you struggle with pimples or acne this could be the reason and something as simple as cleaning your brushes can help! Trust me - it worked for me.
-S
Photos: MACCosmetics.com and Sephora.com
Monday, July 7, 2008
Wedges are a Must
Today is a day for adding. As I applied my makeup this morning, I realized something. I really wanted to add to my post about priming because I never explained the technique I use with my beloved F.Y. Eye.
When I first began using the product, the girl at Sephora told me to use a Q-Tip to get some of the product out of the bottle and then to use a wedge for blending and smoothing purposes. Over time, of course, I became a little lazy and started using just the wedge to apply and spread the primer. I feel like this really is the easiest method. If you take the corner of the wedge and dip it in the primer you'll get enough to smooth over your lid. If you need some more you can always add.
But which end do you use? Well I like to use the thinner end to grab the product from the bottle and I then use that end to rub it in a little. Sometimes I'll use the fat side that's perpendicular to the thin side. So if you have a wedge with the longer side sitting on the counter, use the larger side that goes top to bottom to really blend the product. Otherwise you may get some extra F.Y. Eye leftover on your lids. You want to really blend enough of that product on your lids.
But don't be using that wedge for weeks on end because that's just unsanitary and wedges are seriously so cheap at your local drugstore. Go get 'em!
-A
Photo: Drugstore.com
shu uemura IS Fantastic
I feel like I need to counter, or add to, our very first post. At that time, I was still using my Revlon curler because it was something I had been stuck on for years and I thought, why change a good thing? Well, after much speculation and talking to some of my girls, I realized I needed to get myself the shu uemura stat.
AMB and SEV were adamant about the fantastic job this curler could do. They told me that they didn't even need to use mascara at times because their lashes would just look so so full after using the shu uemura. In our first post we led you to believe that there was really no difference between shu uemura and MAC, giving MAC a slight edge because of a price that was five dollars cheaper. But now I really believe in the power of shu uemura.
Although I felt strange using it at first, as it is very different than the Revlon, I quickly became accustomed to the shu uemura. I have yet to see the grand effects that AMB and SEV have told me about because I still feel the need to put on primer plus three different mascaras. However, I think that my lashes look longer and fuller. And I think with time I may be able to wean myself down to just one mascara!
One thing is for sure, I'll definitely use my shu uemura every single day. Heck, I may even need to get the travel size and throw it in my bag!
-A
Photo: shuuemura-usa.com
Labels:
eyelash curler,
shu uemura
Friday, July 4, 2008
A Tip About My Favorite Spackle
I fell in love with the Laura Geller Spackle when I used a sample from my giant collection. I then got my mom hooked on the stuff too. When I ran into Sephora to buy the full size, I grabbed the box labeled spackle, saw it had some extra perks like eye and lip primer, and threw it in with my huge stash of common products to be purchased. This is the Spackle Trio (pictured, right). Mind you, this purchase took me about five minutes and I spent almost $150. Why is it that you run out of the most important, expensive stuff at the exact same time?! I hate that!
Anyway, this was a serious mistake. My mom got the real bottle, which is comprised of 2 oz (pictured left), while mine only has 0.85 oz. I may have the lip and eye primers, but I am certainly not a fan. I tried the eye primer one day thinking that it could be a good switch from my beloved F.Y. Eye (not because I don't want to use my lovely Benefit product, but because sometimes it's good to switch it up). I was seriously mistaken. My shadow was all over the place within an hour and I was quite upset. And we already know how I feel about putting things on my lips so I doubt I will use the lip primer. But who knows, maybe I'll give it a whirl.
My other point about the spackle is that not only will you get more out of a regular bottle, but it also costs a lot less. For 2oz, you'll pay $21.50, but for the Trio it'll run $30. That was certainly a mistake purchase for me and I definitely will know better for next time!
-A
Photos: Sephora.com
Labels:
face,
laura geller,
spackle
Wednesday, July 2, 2008
Sleeping Beauty
I made extra sure this morning to apply my Too Faced Mineral Water Eye Brightening Pencil.
I didn't get enough sleep last night. That's what a night out on the town on a Tuesday night will do to you when you're no longer in college. I need my beauty sleep! I know everyone talks about beauty sleep but what is this phenomena?
Basically the phrase is completely true. If you get enough sleep at night (I like to say seven to eight hours is perfect) then you'll look rejuvenated and refreshed in the morning. If you haven't slept much then you will certainly look it, no matter how much makeup you put on. Remember, makeup is used to enhance and not specifically to hide (except in the case of concealer for those nasty zits!).
Even though I put on my Too Faced Eye Brightener this morning, I felt like my eyes were the size of golf balls, protruding out of my head all day. I was told I didn't look like that, but I guess that's the miracle of a good product. And you'd think that I'd make sure my hair was perfect to counter this interesting face today. But no, the hair is semi-up, which really doesn't work so well with a short bob.
I will certainly be getting my beauty sleep tonight. And it may not be as many hours as, say, Sleeping Beauty, but if you think about it that princess must have had a sad-looking face...
-A
Photo: Nordstrom.com
Unexpected Purchases
I had dinner with SEV last night and told her about my lip debacle. How, I asked her, could I find just the right lip color. Let me tell you a little story.
SEV is not the most makeup obsessed. She uses very basic makeup, but it certainly works on her. Upon walking through Bloomingdale's one day, she came upon a very interesting free gift set that was being offered by Clinique. But she had to purchase a certain amount of products before she could get the free gift. As she browsed through their products, SEV was kind of discouraged because she didn't specifically need anything.. you never really do if you're browsing. She really wanted this bag of free goodies, which she tells me she really only uses the cosmetic bag the most.
So she took one for the team and bought two products. One was a Brush-On Cream Liner that she now swears by. And the other was a Superbalm Moisturizing Gloss. She loves this as well and got me to try it last night. I'd like to keep checking out the products but I did, in fact, like this one. It wasn't as sticky as most glosses and I didn't really feel like I had anything on my lips. I think this is because it was a balm.
A few things come out of this blog and my dinner with SEV:
1. You can really find some great products when you least expect it.
2. I'm on my way in the hunt to find the perfect lip gloss.
3. Free things are always a plus (remember what I said about samples).
4. Talking about your problems with your friends will often help you find a solution.
5. Browsing may sometimes have you spending money you didn't expect, but it can and will make you happy!
-A
Photo: NeimanMarcus.com
Subscribe to:
Posts (Atom)